
Set up Web on Github (Academicpages Template)
In this blog, I record the process about setting up my website on Github.
- Tool: Github Desktop, VS Code.
Check this blog on github.
Contents:
1. Usefull resources
- GIthub Pages (https://pages.github.com/)
- Themes
- https://pages.github.com/themes/
- http://jekyllthemes.org/
- https://jekyllthemes.io/
- Others
-
How to Create a Blog Using Jekyll and GitHub Pages on Windows
*you don’t need to install jekyll server if you don’t need to compile markdown locally. Just push your changes to github, view the changes on your website address.
2. Set up my web step by step
2.1 Choose your favorite theme
Once you choose your favorite theme, fork its repo.
I choose this academic theme (https://academicpages.github.io/). Fork it.
Go to the repo in your Github, rename the repo’s name to [your_name].github.io.
2.2 Customize the theme
-
Change profile: in file
_config.yml,-
In Site Settings section, change name, description, url.
-
In Site Author section, change name, avatar, bio, location, and social media you want to add.
-
-
More words on social media:
-
Add social media name or full link depends on the setting in
_includes/author-profile.html. If the social media is not provided in the file, you can add a new code block into above html file.
-
Change the
<i class="fas fa-link">to add icon for your social media.
-
-
Change top menu: in file
_data/navigation.yml-
Add or remove menu, for example:
- title: "About me" url: /aboutme/ -
url will connect the markdown file
_pages/aboutme.md, editaboutme.mdto change the contents.
-
-
Add new blog:
_posts/blog-demo.md-
Add new markdown file in the folder
_posts -
Add images to folder
images
-
-
Add attachments:
_publications/2009-10-01-paper-title-number-1.md- Add the attachment to folder
files[Download the file](http://ycheng22.github.io/files/paper1.pdf)
- Add the attachment to folder
3. Run server locally
3.1 Install Ruby
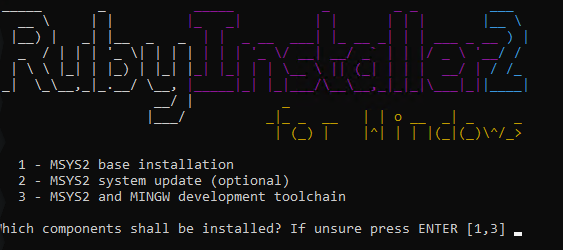
Jekyll is written in Ruby as a gem, so to run Jekyll on Windows we’ll first need to download and install RubyInstaller for Windows. Make sure to download a recent Ruby+DevKit version and use the default options in the installation wizard. On the last step, you’ll want to keep the option “Run ‘ridk install’ to setup MSYS2 and development toolchain.” checked.
In the prompt, choose 1.
3.2 Install jekyll
gem install jekyll bundler
Let’s confirm jekyll is installed:
jekyll -v
Then you can run bundle install to add more necessary packages.
If everything works correctly, run will start the serve at below address.
bundle exec jekyll serve
Address: http://127.0.0.1:4000
Or you can specify the address:
bundle exec jekyll serve --port=8000
The address will be: http://127.0.0.1:8000
3.2 If the port is occupied
To find out which process is using the port, run
netstat -aon | findstr "4000"
start task manager -> services -> kill that service.
you can also list task by
tasklist | more
and kill that process by pid
taskkill /F /PID pid_number.

Comments